So, you have recently acquired the animation maker but hasn’t the first idea when it comes to actually using it? Fret not, new systems always come with a learning curve and there is no shame in climbing it. That being said, you don’t have to face this climb alone, that is why we have compiled this basic tutorial on all of our platform’s functions for you.
Acquiring New ToolsYou can access all products in the platform available for purchase in the shop tab on the top bar of the page after you logged in. The items are displayed in a gallery along with their price and can be bought with a simple click, with no complicated checkout thanks to the token system. Once your purchase is done you will be able to access your recently acquired tools under my projects, where you can sift through them in a similar fashion to the store.
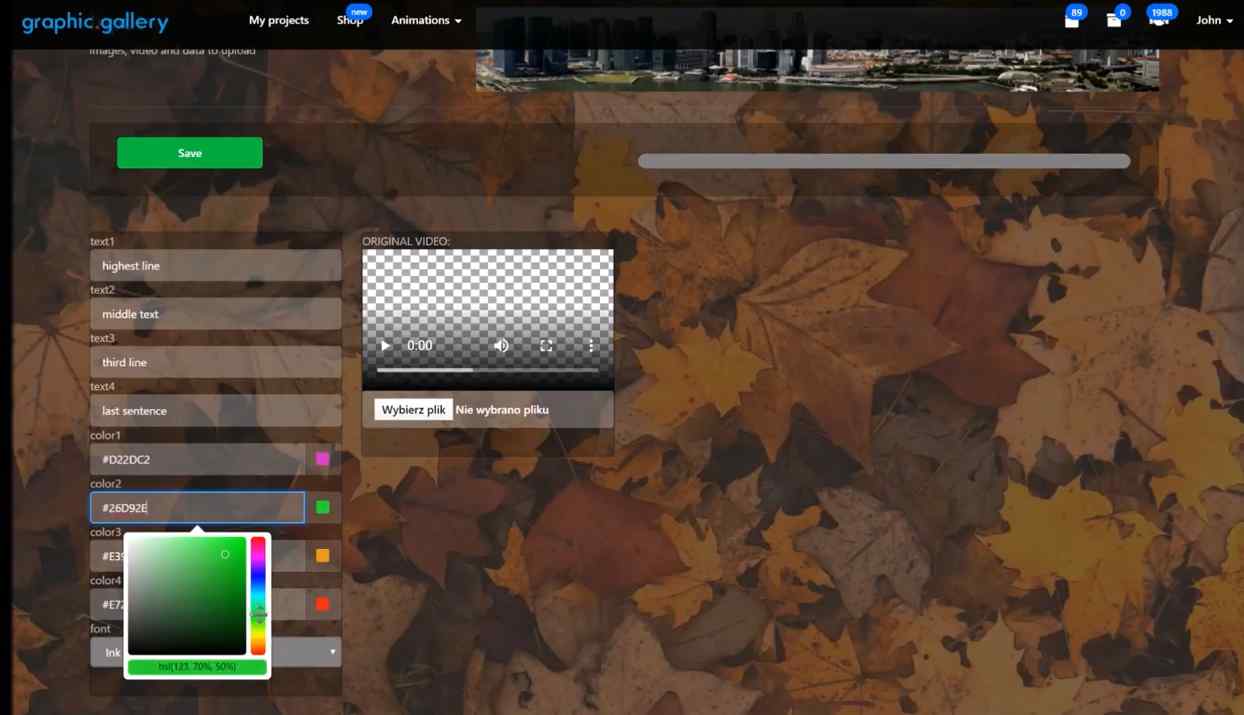
Making your projectsIn order to create something with the tools you just acquired you’ll need to click on it with your mouse and click “input”. Once you do, the editing page will load, where you will see all options for customization listed on the left and the preview visualizer on the right. When it comes to what these options are, it will vary according to the project and tool and you're using, but for the sake of example, let’s say you are editing Text Stone C. In this particular resource, you can change the written content on the three lines that compose it, you can also change the color scheme by dragging the mouse through a spectrum. Finally, there is also the option for changing the text font to fit whatever context you may need it to. Once you have filled out all your choices, you can press move to the create tab.
ProcessingNow that you’ve got your project ready it’s time to convert and download it for use by going to the “animations" tab and selecting the “create” option. By doing this you will be prompted to select a number of different versions of your project, varying by the quality of resolution, video format and even whether you want a background or not. After you take your pick just click start and you spend one token to add your project into the conversion queue. Then, you can return to your project library and hover over it once again, this time choosing the “output” option, which will take you to the download page where you can get it into your computer by simply clicking its name.
ConclusionNow that you have gotten the specifics of animation maker down to a tee, you might have realized that, in fact it has a very simple and user-friendly interface. All of its functionalities are available to you at the click of a button and once get the handle of the production process, you will be able to make killer animations lightning fast. Of course, being human beings, we might be prone to forgetting one step or another, which is absolutely normal. If that happens, feel free to return to this tutorial however many times you want.

